Prerequisites
-
LenelS2 OnGuard instance, with the following attributes properly configured:
-
user_name; this can be your system account created during PACS installation or newly created API user - see steps below -
password; -
application_id, that it's provided as part of the license; and -
directory_id(These values will be required as part of the agent configuration.)
-
-
API version: LenelS2 OnGuard 1.2 or later.
Configuration
PACS Configuration
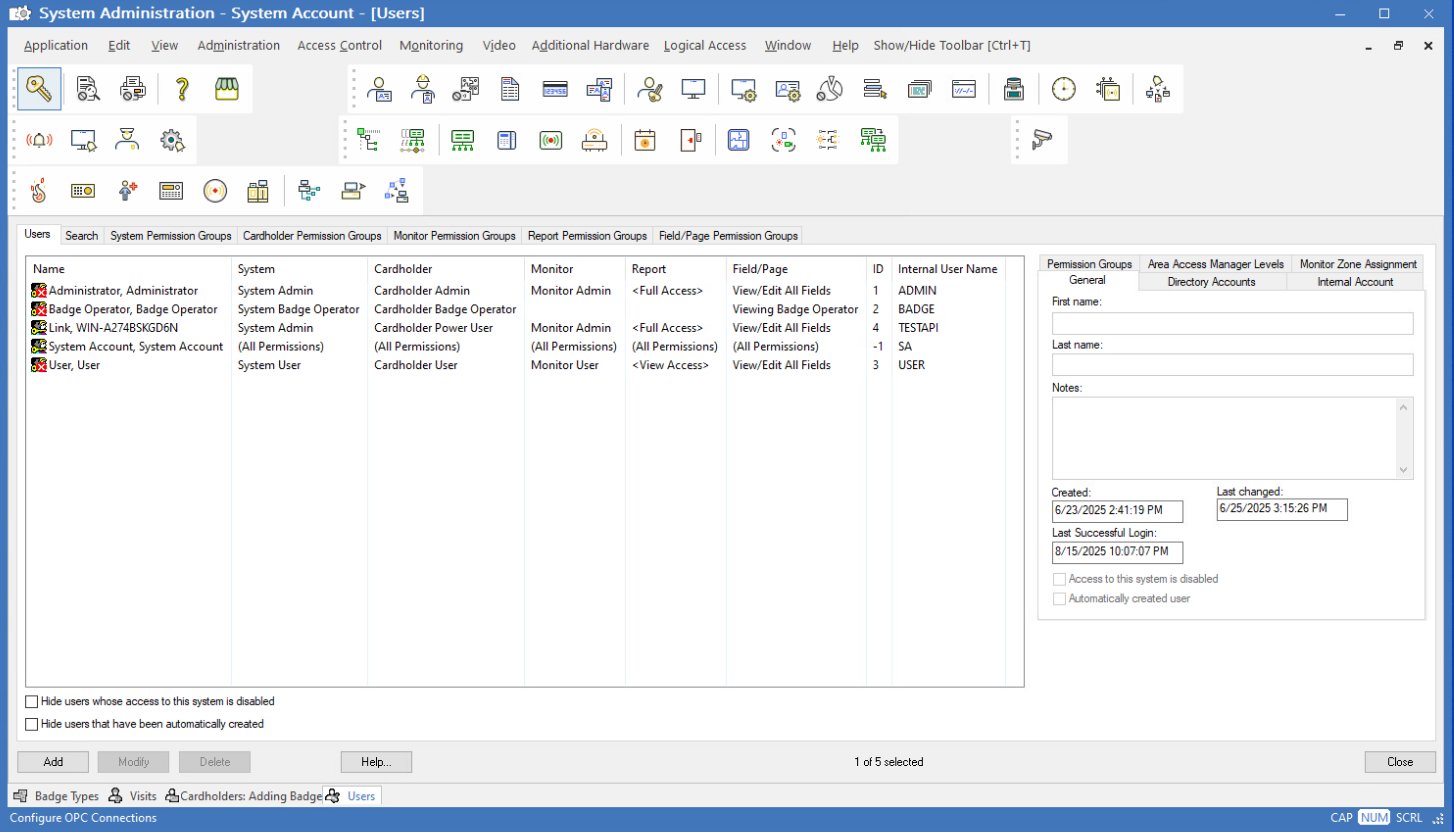
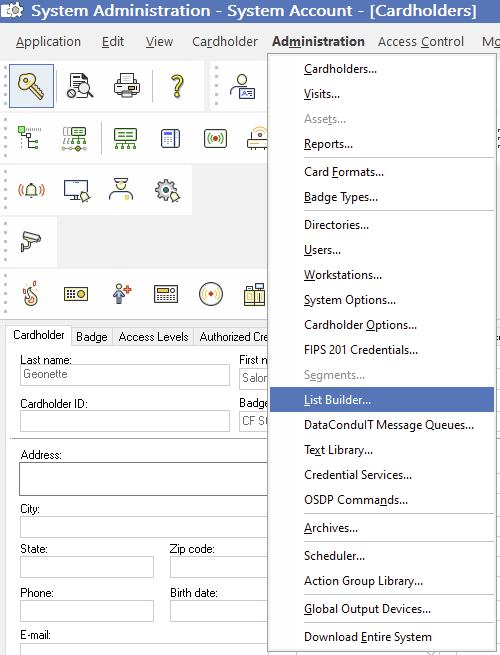
Step 1: Create a New API User in LenelS2 OnGuard
-
1.1 Go to user administration
-
Login to OnGuard System Administration using your system administrator account.
-
Click Administration → Users.
-
-
1.2 Add a new local user
-
Click Add on left bottom corner.
-
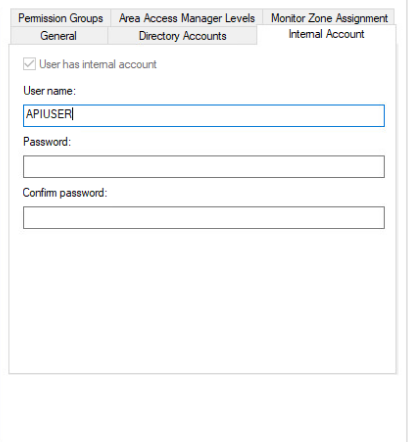
Click Internal Account tab on right side menu.
-
Add your new API username
-
Add password
-
Repeat password
-
-
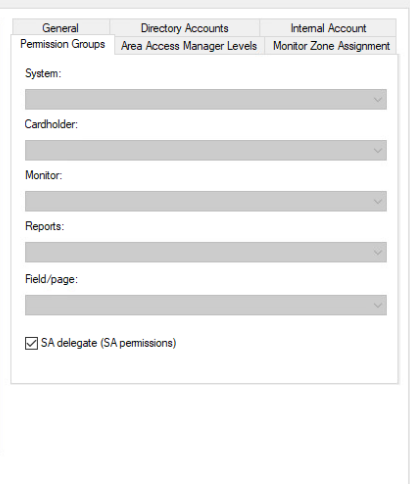
1.3 Set administrator permissions
-
Click Permission Groups on right side menu
-
Check “SA delegate (SA permissions). This will ensure user has administrative privileges needed to administer PACS system.
-
-
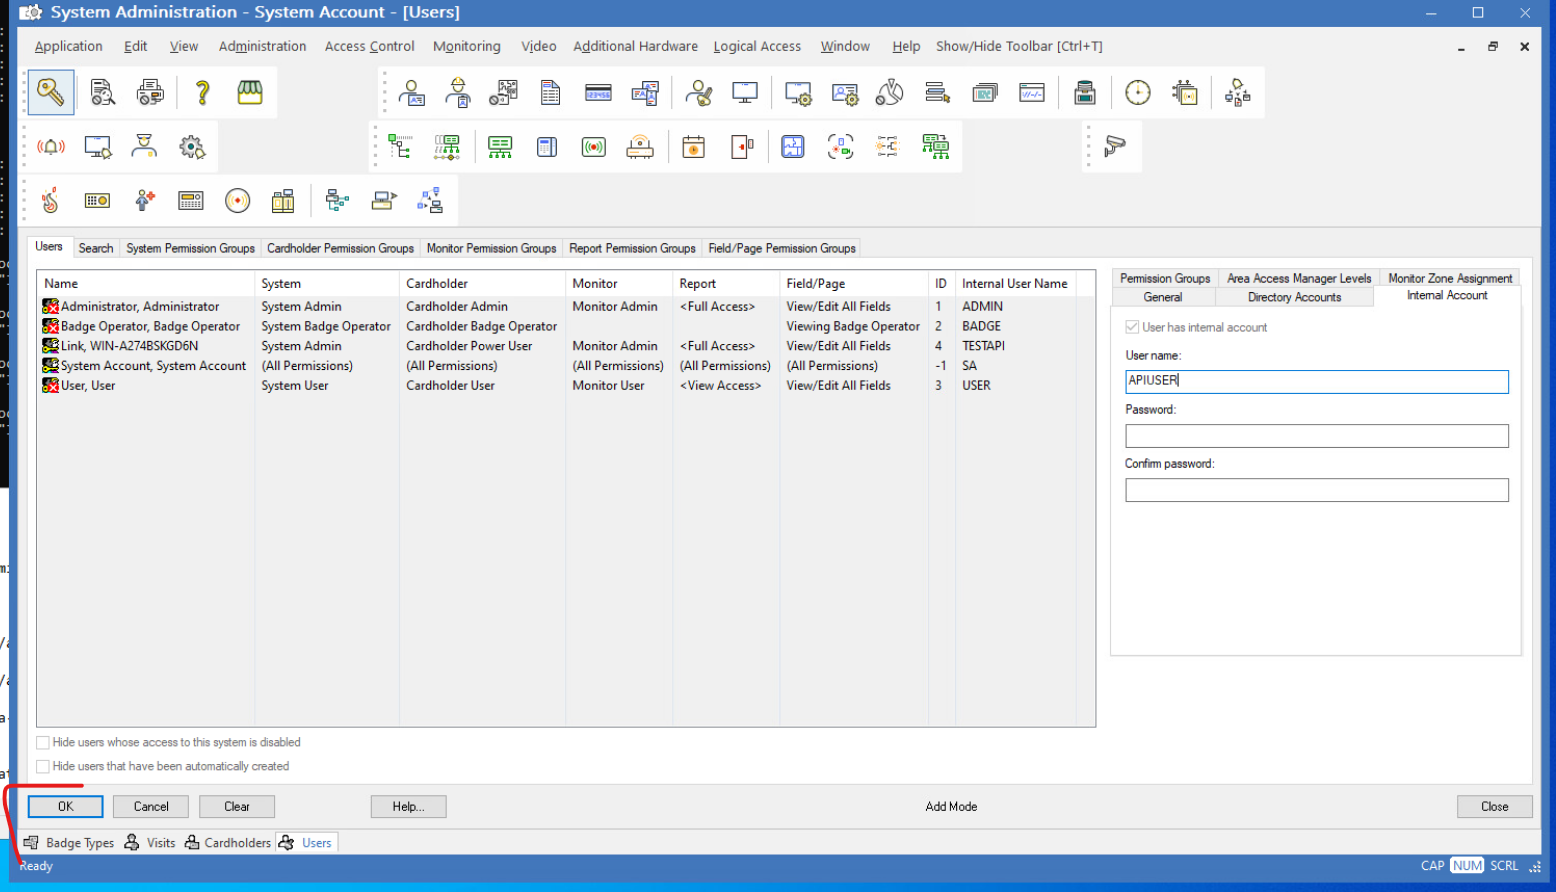
1.4 Confirm
-
Click OK on left bottom corner.
-
-
1.5 Verify
-
You should now be able to login to System Administration and API using this newly created user.
-
Assuming Directory Accounts was not modified, user should have directory
id-1.
-
Step 2: Add custom fields
The agent requires custom fields to be defined on Cardholder and Visitor entities. These fields cannot be created via API and must be manually added using the FormsDesigner application included with LenelS2 OnGuard.
-
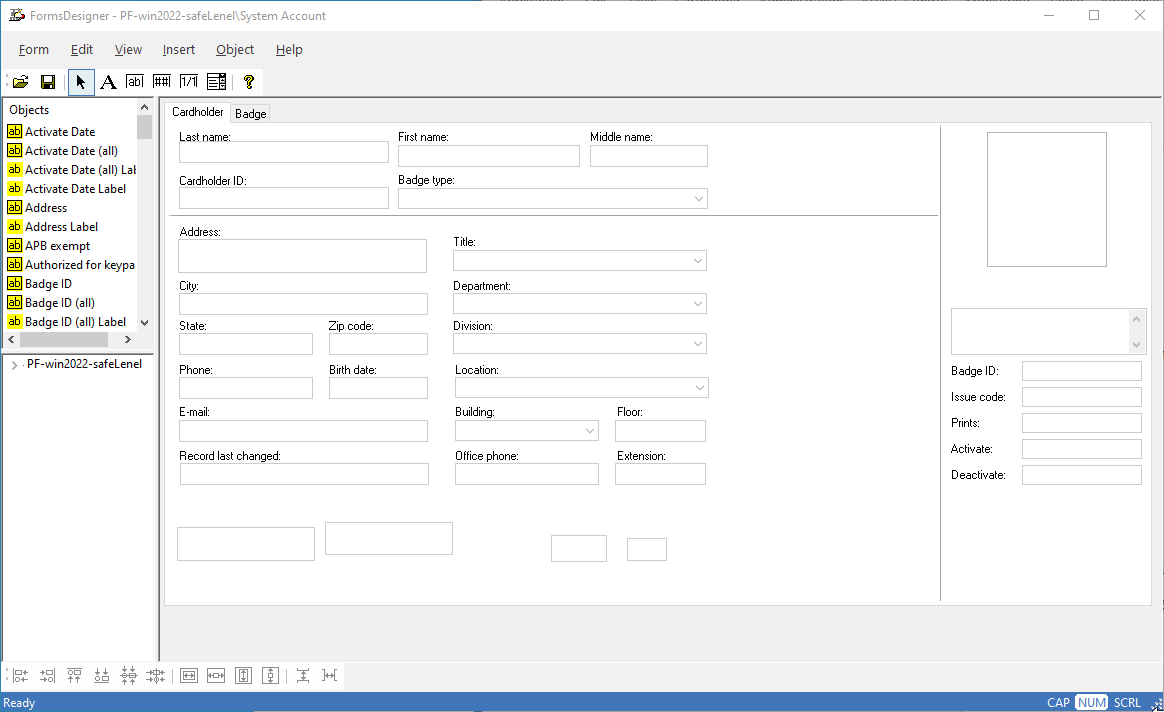
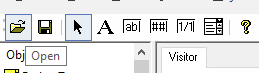
Open FormsDesigner and log in.
-
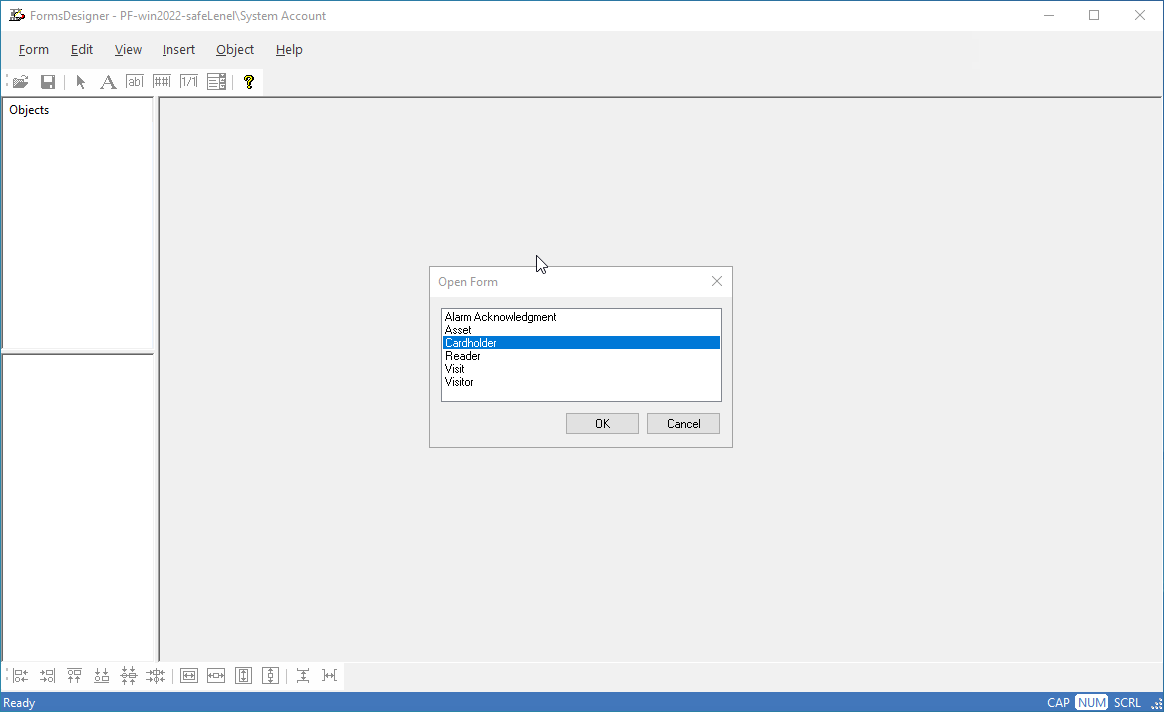
Select Cardholder:
-
Click Insert Text Field and place it onto the form.
-
Set the field properties:
-
Field name:
C_EXTID -
Length:
150
-
Once added, the C_EXTID field becomes available for use on cardholders by the agent. Picture below is animated:
-
Repeat the process for all required fields:
-
Cardholder Fields:
-
C_EXTID(Text, Length: 150) -
C_TECHBG(Numeric, Length: 10)
-
-
Visitor Fields:
-
C_EXTID(Text, Length: 150) -
C_VISIT(Numeric, Length: 10) -
C_TECHBG(Numeric, Length: 10)
-
-
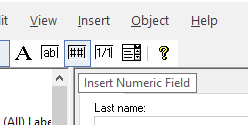
Some of these fields are of numeric type; you can create them by clicking the Insert Numeric Field button instead of the text field option:
To configure visitor fields, open the Visitor form and repeat the process:
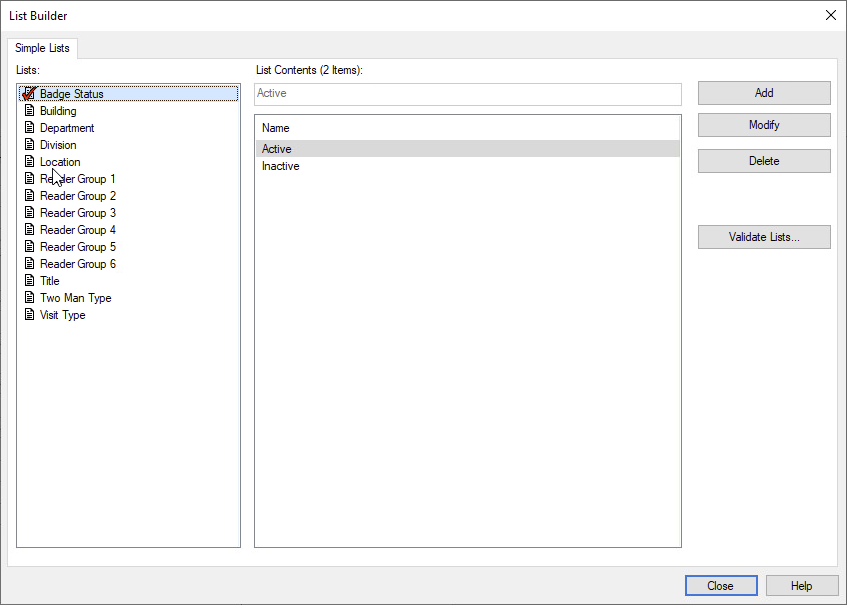
Step 3: Add Inactive badge status
-
By default, OnGuard does not include an
Inactivestatus for badges. This status must be explicitly added using the ListBuilder functionality in the System Administration application:
-
All statuses except for
Activeshould be removed, and a new status calledInactiveneeds to be added:
Step 4: Add technical badge types
-
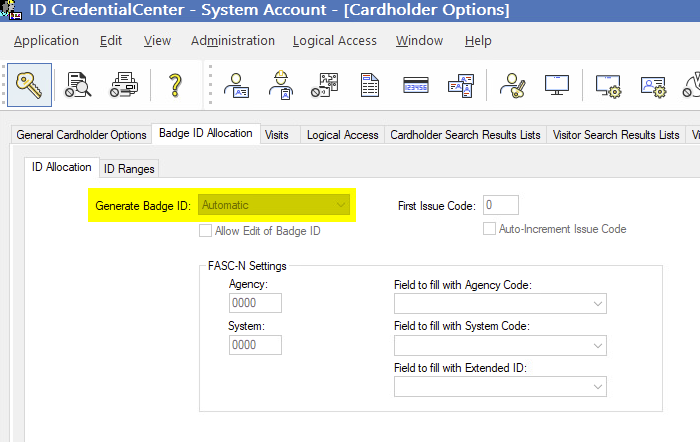
Open Cardholder Options and under the Badge ID Allocation tab set the Generate Badge ID to
Automatic.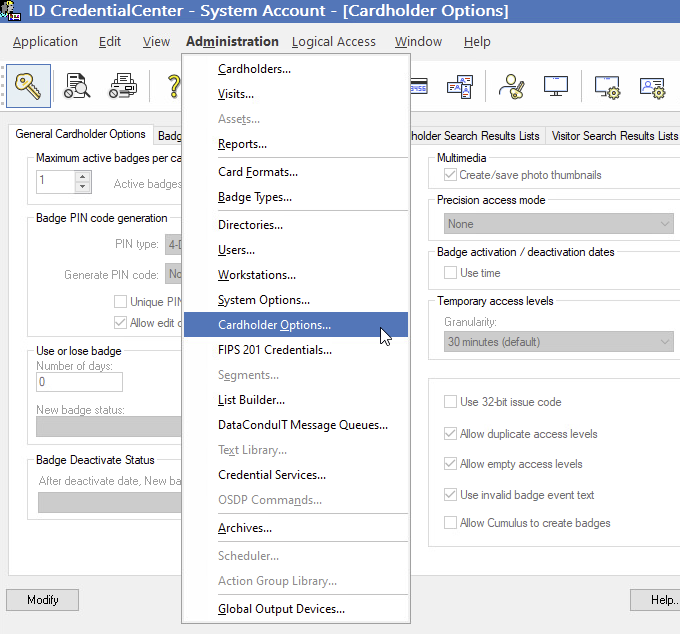
-
We need to add
CARDHOLDER_TECHBG_TYPEandVISITOR_TECHBG_TYPE. These badge types are used for internal storage of access levels.
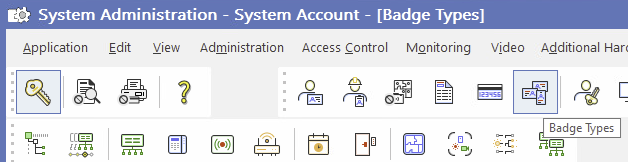
Navigate to the System Administration application and selectBadge Types.
-
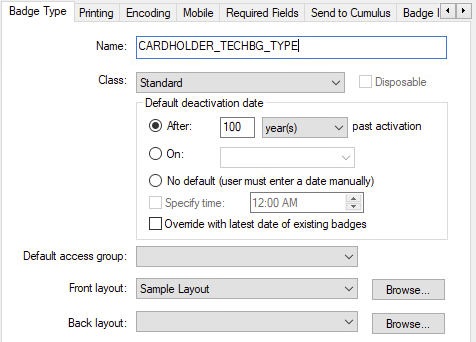
Create a new badge type and complete the form as follows:
-
For the
CARDHOLDER_TECHBG_TYPE, set theClasstoStandardand choose a value forDefault deactivationthat suits your needs - for example,100years, so it effectively never expires. -
The
VISITOR_TECHBG_TYPEis almost identical, except theClassmust be set toVisitor.
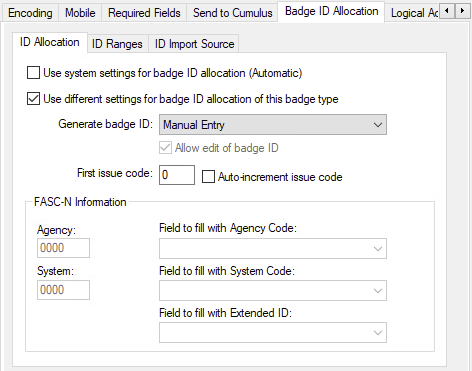
Step 5: Badge ID allocation and ranges
-
Because HIS sets the
Badge IDwhen creating a new badge, you must also configureBadge ID Allocationto all of yourBadge Typesexcept for technical badges (CARDHOLDER_TECHBG_TYPEandVISITOR_TECHBG_TYPE), which use the default automatic allocation. -
In the Badge ID Allocation tab:
-
Set
Generate badge IDtoManual Entry, and -
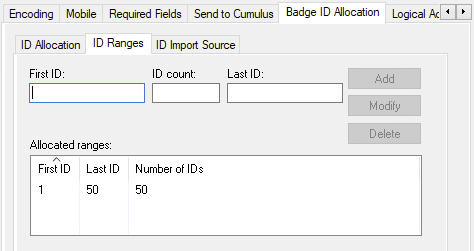
In the
ID Rangessubtab, specify the valid ranges for your badges.
-
You will need to provide these badge ID ranges to the agent in its configuration so it knows which ranges to send to HIS.
Agent Configuration
General agent startup
Step 1: Download
To obtain the pacs-agent_{pacs-name} Docker image, follow the HID Agent Administration Guide for End-Customer.
Step 2: Create environment
Create a file named .env with the following content:
Agent__TenantId=example-tenant-id
Agent__PacsId=example-pacs-id
Auth__ClientId=your-client-id
Auth__ClientSecret=your-client-secret
In case you are connecting to a different environment than HID production, you need to set the proper URLs:
Auth__AuthNProvider=https://auth.example.com
Agent__PlatformUrl=https://platform.example.com
-
Adjust all file parameters according to your setup.
-
It is recommended to store this configuration on an encrypted drive or delete
.envfile as soon as the Docker image is executed.
Step 3: Run Docker image
docker run -d \
  --env-file .env \
  pacs-agent-{pacs-name}:latest
Step 4: Check that the Docker image is running
docker ps
Environment variables description
Related to HIS
-
Agent__PlatformUrl: HID Integration Service URL (https://his.hidglobal.com/ais/v1).-
This information is provided by HID. By default, this is set automatically to the production environment value and does not need to be set manually in most cases.
-
-
Agent__TenantId: Tenant ID within HID Integration Service.-
This information is provided by HID.
-
-
Agent__PacsId: Unique ID assigned to the agent during registration.-
This information is provided by HID.
-
If you registered your PACS on your own, this would be the
IDyou gave to the PACS.
-
Related to HID Authentication Service
-
Auth__AuthNProvider: HID Authentication Service URL (https://auth-us.api.hidglobal.com/idp/t89d23e0b2445510399335/authn).-
This information is provided by HID. By default, this is set automatically to the production environment value and does not need to be set manually in most cases.
-
-
Auth__ClientId: Client ID obtained during registration.-
This information is provided by HID.
-
-
Auth__ClientSecret: Client secret obtained during registration.-
This information is provided by HID.
-
Don't forget to replace the {pacs-name} placeholders with the actual name of the pact agent.
Agent-specific configuration
{pacsd-name} = lenel
Environment variables for LenelS2 OnGuard:
-
Lenel__Url: LenelS2 OnGuard API URL (excluding/onguard).-
The default port for LenelS2 OnGuard is
8080, but it can be changed. -
If the agent is running on the same machine as LenelS2 OnGuard, you can enter
http://localhost:8080orhttps://localhost:8080(in case SSL is enabled). -
In case OnGuard is running on a different machine than HIS agent, firewall network access and a valid IP address reachable on the same network are required.
-
-
Lenel__ApplicationId: LenelS2 OnGuard Application ID.-
This value should be provided with your OnGuard license.
-
-
Lenel__DirectoryId: LenelS2 OnGuard Directory ID.-
Please refer to the above section on how to configure OnGuard for API access.
-
-
Lenel__UserName: API username.-
Please refer to the above section on how to configure OnGuard for API access.
-
-
Lenel__Password: API password.-
Please refer to the above section on how to configure OnGuard S2 for API access.
-
-
We must also specify the badge types and their associated ID ranges. For example, if there are two badge types - Employee (IDs
1–100) and Visitor (IDs101–200) - the configuration should look like this:
Lenel__BadgeConstraints__Employee__Id__Ranges__0__Start=1
Lenel__BadgeConstraints__Employee__Id__Ranges__0__End=100
Lenel__BadgeConstraints__Visitor__Id__Ranges__0__Start=101
Lenel__BadgeConstraints__Visitor__Id__Ranges__0__End=200
Agent-specific .env file part example:
Lenel__Url=https://localhost:8080
Lenel__ApplicationId=applicationID
Lenel__DirectoryId=id-1
Lenel__UserName=apiUsername
Lenel__Password=apiPassword
Lenel__BadgeConstraints__Employee__Id__Ranges__0__Start=1
Lenel__BadgeConstraints__Employee__Id__Ranges__0__End=100
Limitations
Unsupported operations
HIS has functionality for first-factor PIN credentials. This functionality is not available in LenelS2 OnGuard and is therefore not supported. Any attempt to invoke the PIN functionality, even through imports, will result in an unsupported operation error. Please consider using a second-factor PIN instead, via the credential extension fields.
HIS has functionality for activating and deactivating identities, but this functionality is not available in LenelS2 OnGuard and is therefore not supported. Any attempt to invoke it will result in the OperationNotSupportedException.
Missing the Events Writing to the PACS feature.
Limited operation
All extension fields are removed from the event data to prevent any leakage of PII.
See the changelog for details on versions and updates.
Naming Mapping
Entities
-
Identity in HIS maps to Cardholder in LenelS2 OnGuard.
-
Visit in HIS maps to Visitor in LenelS2 OnGuard.
-
Credential in HIS maps to Badge in LenelS2 OnGuard.
Creation of extension fields
HIS supports custom extension fields:
-
Register the custom fields at both the tenant and agent (PACS) levels through the AIS; this process is documented here.
-
Configure these fields within LenelS2 OnGuard. The process is identical to what you’ve already done when adding the required custom fields for the agent in the setup section.
Field type: Always use the Text type when adding extension fields. The HIS will handle any necessary type marshalling automatically.
Credential extension fields are available for read operations only with the $.self.* syntax, as LenelS2 OnGuard does not support badge extension fields.
LenelS2 OnGuard Agent Certification
See agent certification and compliance for more information.