Prerequisites
-
Genetec Security Center installed and operational.
-
Working Genetec API key that came with your license.
-
We’ve tested the agent against versions 5.12.2.2 (with API version 5.12.2181.2030) and 5.13.0.0 (with API version 5.13.121.36).
Configuration
PACS Configuration
The following steps outline the process for configuring Genetec Security Center to work with AIS.
Step 1: Config Tool
-
Launch the Genetec Config Tool (either directly, or through Security Desk > Tools > Config Tool).
-
When prompted for server, enter
localhost. -
Log in via your admin account.
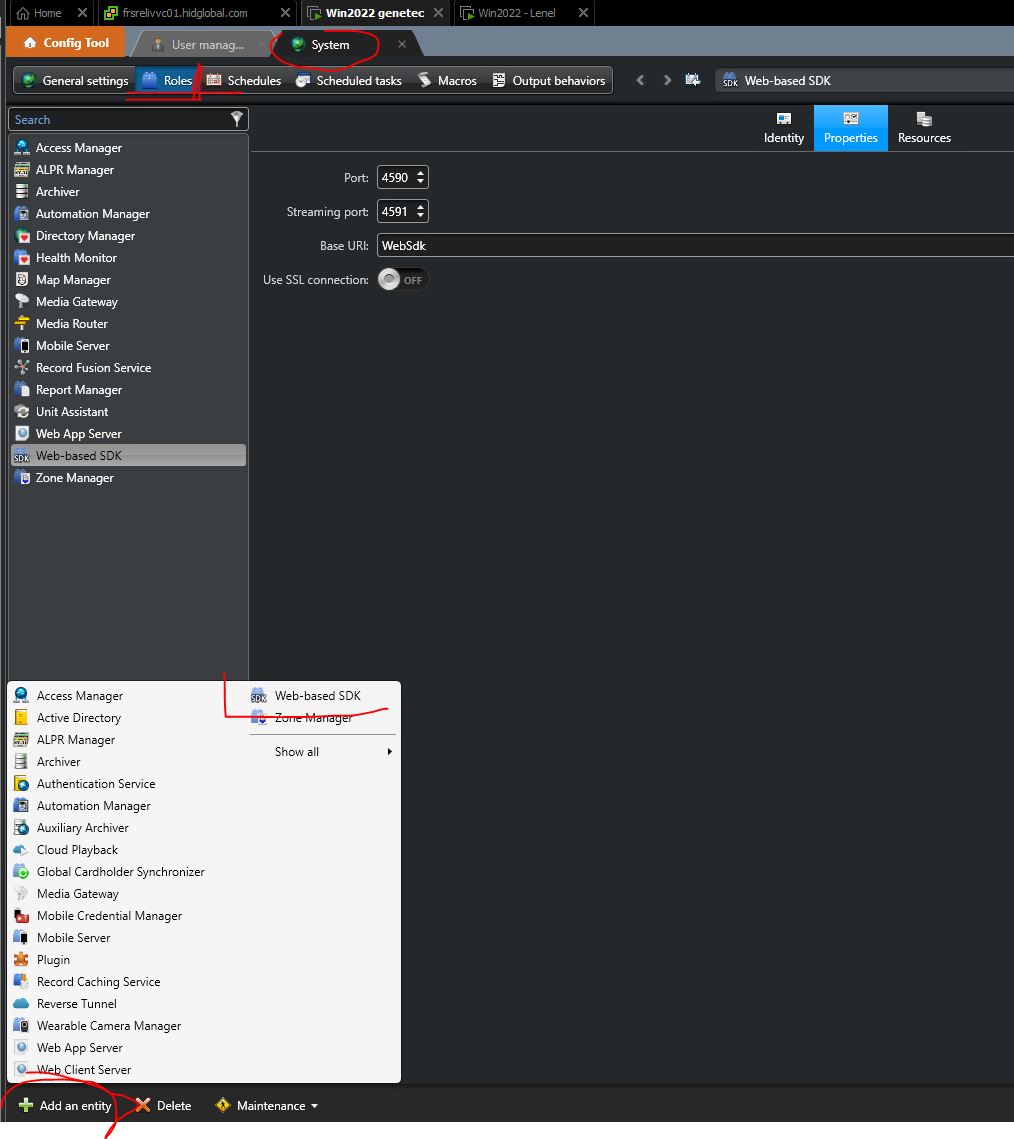
Step 2: Enable Genetec API
-
In Genetec Config Tool, navigate to Tasks → Administration → System → Roles.
-
Click on Add an entity.
-
Select Web-based SDK.
-
Choose the desired port where the
WebSdkshould be accessible or leave the default port 4590 (used in the following examples).
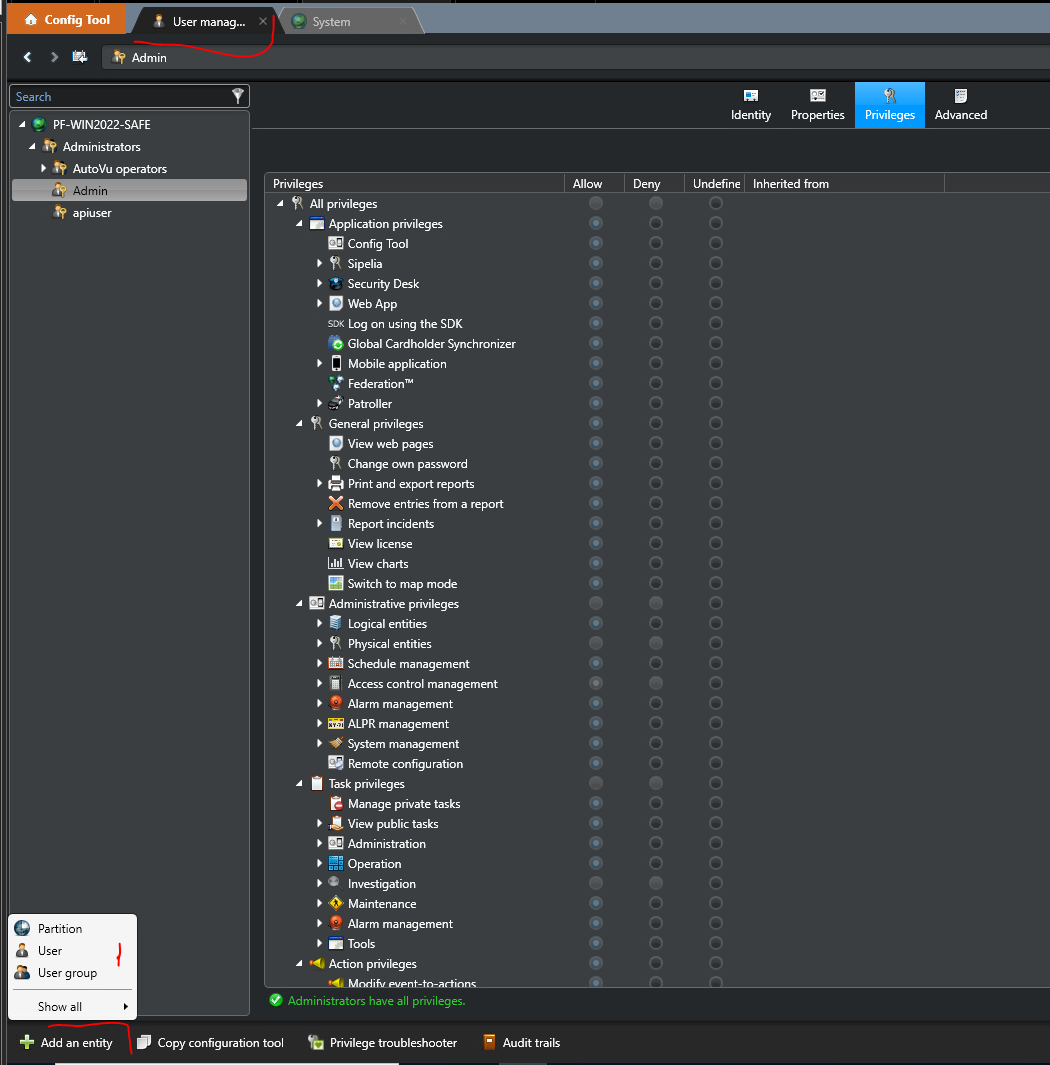
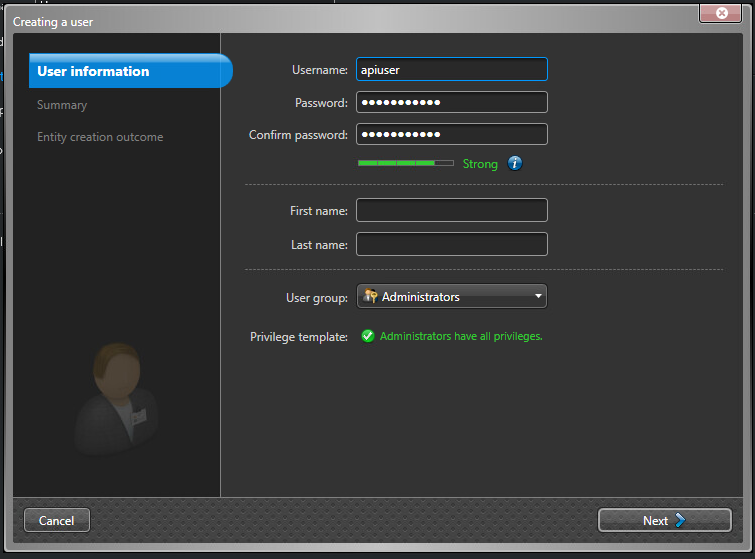
Step 3: Create a user for the API
-
In Genetec Config Tool, navigate to Administration → User management → Add an entity → User.
-
Configure authentication settings as follows:
-
Username & Password: Create a dedicated API user with a strong password.
-
Permissions: Select as user group Administrators.
-
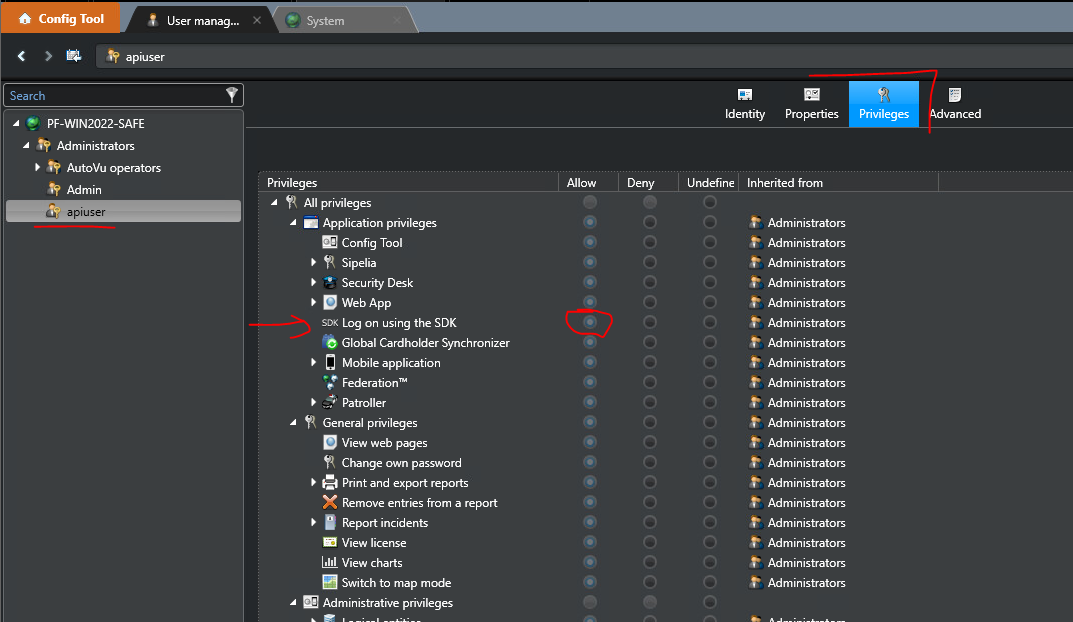
Verify that the user has the granted permit to use SDK in the Privileges Tab.
Step 4: Verify API Functionality
-
Open a command prompt and run the following:
-
curl -u "<user>;<api_key>:<user_password>" -X GET "http://localhost:4590/WebSdk/" -H "Accept: text/json" --verbose -
When SSL is enabled, you should use the
https://protocol and--insecurecurl flag because the certificate is self-signed.
-
-
If configured correctly, the API should return a response similar to
{"Rsp":{"Status":"Ok"}}* Connection #0 to host localhost left intact
Agent Configuration
Example: Genetec agent startup
Step 1: Download
Download the pacs-agent-genetec Docker image using the manual described in the SFTP section of the documentation.
Step 2: Create environment
Create a file named .env with the following content:
Genetec__Url=http://localhost:4590/
Genetec__Authorization=username;apiKey:password
Agent__TenantId=example-tenant-id
Agent__PacsId=example-pacs-id
Auth__ClientId=your-client-id
Auth__ClientSecret=your-client-secret
In case you are connecting to a different environment than HID production, you need to set proper URLs:
Auth__AuthNProvider=https://auth.example.com
Agent__PlatformUrl=https://platform.example.com
-
Adjust all file parameters according to your setup.
-
It is recommended to store this configuration on an encrypted drive or delete the
.envfile as soon as the Docker image is executed.
Step 3: Run Docker image
docker run -d \
  --env-file .env \
  pacs-agent-genetec:latest
Step 4: Check that the Docker image is running
docker ps
More information about the configuration
Related to Genetec
-
Genetec__Url: Is the URL of the Genetec WebSdk.-
The default port for Genetec is
4590but it can be changed in Genetec Security Center. -
If the agent is running on the same machine as the Genetec Security Center, you can enter
http://localhost:4590orhttps://localhost:4590(in case SSL is enabled). -
In case Genetec Security Center is running on a different machine than the HIS agent, firewall network access and a valid IP address reachable on the same network are required.
-
-
Genetec__Authorization: The agent needs to be authorized against the Genetec API.-
The Genetec uses basic authorization. The value must be in the format
{username};{apiKey}:{password}. -
apiKeyis provided with your Genetec license; theusernameandpasswordneed to be setup on PACS system as described in this section.
-
Related to HIS
-
Agent__PlatformUrl: HID Integration Service URL (https://his.hidglobal.com/ais/v1).-
This information is provided by HID. Since Genetec agent version 1.1, this is set automatically to the production environment value and does not need to be set manually in most cases.
-
-
Agent__TenantId: Tenant ID within HID Integration Service.-
This information is provided by HID.
-
-
Agent__PacsId: Unique ID assigned to the agent during registration.-
This information is provided by HID.
-
If you registered your PACS on your own, this would be the
IDyou gave to the PACS.
-
Related to HID Authentication Service
-
Auth__AuthNProvider: HID Authentication Service URL (https://auth-us.api.hidglobal.com/idp/t89d23e0b2445510399335/authn).-
This information is provided by HID. Since Genetec agent version 1.1, this is set automatically to the production environment value and does not need to be set manually in most cases.
-
-
Auth__ClientId: Client ID obtained during registration.-
This information is provided by HID.
-
-
Auth__ClientSecret: Client secret obtained during registration.-
This information is provided by HID.
-
Optional Genetec configurations
-
Genetec__AccessUnit(Optional, default = CardholderGroup): The type of access unit from Genetec that the agent will use.-
The supported values are
CardholderGroup,AccessRuleandArea.
-
The default value is CardholderGroup. Changing this to a non-default value might cause improper agent behavior. Please refer to the below section for more details. Change at your own risk.
-
Genetec__UrlLengthLimit(Optional, default = 2000):-
The maximum length of URL that can be sent to Genetec API.
-
This is used only when fetching multiple entities from the Genetec API, since all the entities have to be specified in the URL.
-
A higher URL limit leads to fewer API calls; however, Genetec HTTP server configuration has configured an upper limit, which might cause some API calls to fail.
-
The default value is 2000 characters. Change at your own risk.
-
Genetec__UseNativeTypesForCreatedCustomFields(Optional, default =false)-
When set to
falsecustom fields created by agents are of typeText. -
When set to
truecustom fields use specific Genetec data types depending on the extension field type (DateTime,Boolean,Decimal,Integer,Text).
-
Limitations
All HIS features are currently supported for this agent.
See the changelog for details on versions and updates.
Naming Mapping
Entities
|
AIS Entity |
Security Center Term |
|---|---|
|
Identity |
Cardholder |
|
Visit |
Visitor |
|
Credential |
Credential (card type) |
|
Card Format |
Card format |
|
Access Unit |
(Based on the agent configuration) |
|
Extension Field |
Custom field |
Operations
|
AIS Operation |
Security Center Behavior |
|---|---|
|
Activate |
Activate |
|
Deactivate |
Deactivate |
|
Check-In |
Check in |
|
Check-Out |
Check out |
Creation of extension fields
HIS supports custom extension fields:
-
The agent automatically creates custom fields in Genetec to store some data from HIS that doesn’t have equivalent fields on the Genetec entities.
Note: if a custom field has a default value, then it will be impossible to remove the ext. field value through AIS (the default value is immediately filled in). -
All HIS internal custom fields start with the prefix
HIS_PACS. Please be aware that you should not delete these custom fields, or the agent will not work properly and data will be lost. -
For
ExternalIDon identities and visits, the agent creates a custom fieldHIS_PACS_ExternalIdon cardholder and visitor entity.
View created extension fields
-
Open the Genetec Config tool.
-
Navigate to System → General settings → Custom fields, and you will see the custom fields:

Mapping of extension fields
-
If you use external mapping for an extension field, a new custom field will be created (creation of the extension fields is handled by the agent itself; there is no need for manual configuration).
-
For example: mapping
$.ext.BirthDayfor identity will create a new extension field for the cardholder calledBirthDay.
-
-
If you use self-mapping for an extension field, then it will be mapped to a native attribute of the entity.
-
For example: mapping
$.self.FirstNamefor identity will be mapped to the cardholder'sFirstNamefield.
-
Known Issues
-
Visit’s native fields:ActivationDate&DeactivationDate, can break the listing of active/inactive visits. -
IdentityandVisitpicture: it is possible to upload bothjpgandpngformats, but the latter is converted tojpegbefore saving on the PACS. -
All endpoints return a successful response immediately after the Genetec API accepts the request, although the requested change may take time to complete, especially if it concerns custom extension fields. In particular, if the endpoint includes a copy of the created or updated entity in its
responseBody, that value is read without delay and may not fully reflect the changes, as the eventual effect of the operation can only be confirmed after a sufficient delay.
Events
Payload Structure for External Events
The HIS supports raising both system events and custom events within Genetec Security Center.
To raise an event, send a POST request with the following JSON body to the HIS external events endpoint. Note that entityId is a required field, while other properties are optional depending on the event type.
{
  "eventType": "<EVENT_TYPE>",
  "customEventId": <CUSTOM_EVENT_ID>,
  "entityId": "<ENTITY_ID>",
  "message": "<MESSAGE>"
}
-
To raise a system event: Set the
eventTypeandentityIdfields to trigger a system event associated with a specific entity. -
To raise a custom event: Set the
customEventIdandentityId(with an optionalmessage) to trigger a custom event associated with a specific entity. (You first need to define the custom event type in Genetec’sConfig Tool→Events→➕ Add an item; the value in theValuecolumn serves as thecustomEventIdfor the request.)